Ad-hoc Raspberry Pi Security Camera
My friend built himself a cottage and wanted a security camera for it. I decided to make one for him using a Raspberry Pi Zero and the NoIR Camera. There’s a lot of resources for building something like this online.
The problem is, there won’t be an internet connection at my friend’s cottage. And all of the solutions you might find assume that the Raspberry Pi can connect to the internet. By the same token, the Pi should be accessible through the home network by Wifi.
So my concept was to install the RPi Cam Web Interface to access the camera feed. Normally, this one is either accessible through the internet or the local network.
When the new wireless version of the Raspberry Pi Zero came out last February, I realized that it should be possible to have it act as a Wifi access point and access RPi through that ad-hoc network.
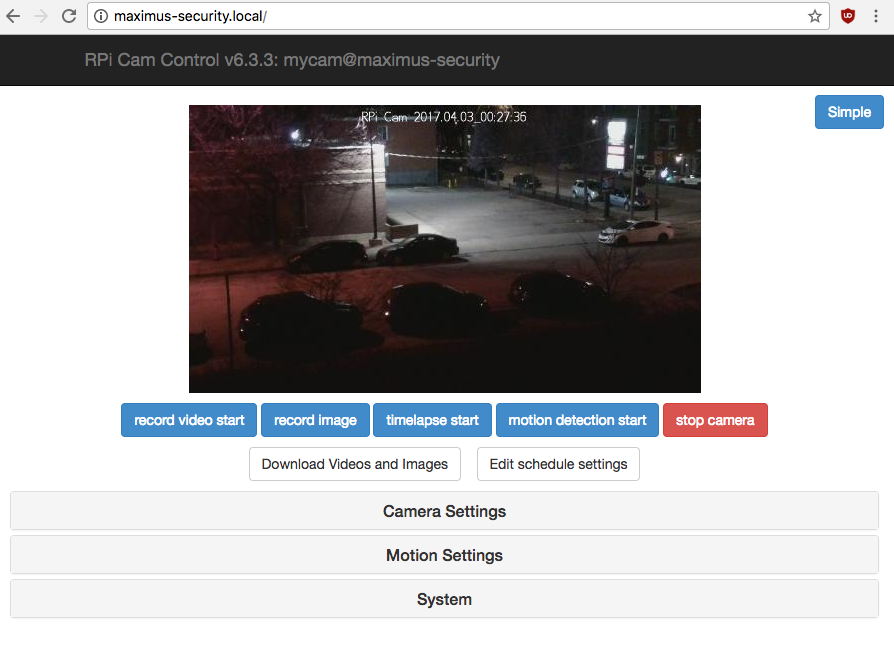
So I first set up the RPi Cam Web Interface using only a USB keyboard, my computer screen and the online instructions. Then, I installed the access point software on the Pi. Now, I can connect directly to the Raspberry Pi through WiFi, go to its local address (you can change it using raspi-config) and access the web feed!
Here’s how it looks:

Instructions:
What you need:
- Raspberry Pi Zero W starter kit or budget pack
- Pi NoIR Camera V2
- Pi Zero Camera cable
- USB keyboard
- HDMI monitor and cable
Steps:
- Connect to the Pi using a USB keyboard and your HDMI monitor
- Boot up the Pi and install a recent version of Raspbian such as Jessie
- When the GUI shows up, open up the terminal by going down through the menu (using the keyboard).
- Connect to your WiFi network by setting it up through the interfaces file. You need an internet connection for steps 5 and 6.
- Install the RPi Cam Web Interface
- Install the access point software by following these instructions. You will have to drop your WiFi connection after downloading hostapd and dnsmasq. I actually entered all the configuration files by hand; it’s boring but it’s not that long. You can stop following the instructions at “Setup IPV4 FORWARDING”; we don’t need the rest.
- When you configure Hostapd, you can choose the SSID that your Pi will broadcast. Here’s mine, for example:

- You can change the hostname of the Pi using “sudo raspi-config”. Then yourhostname.local will be the address where you can reach RPi Cam Web!